User Management
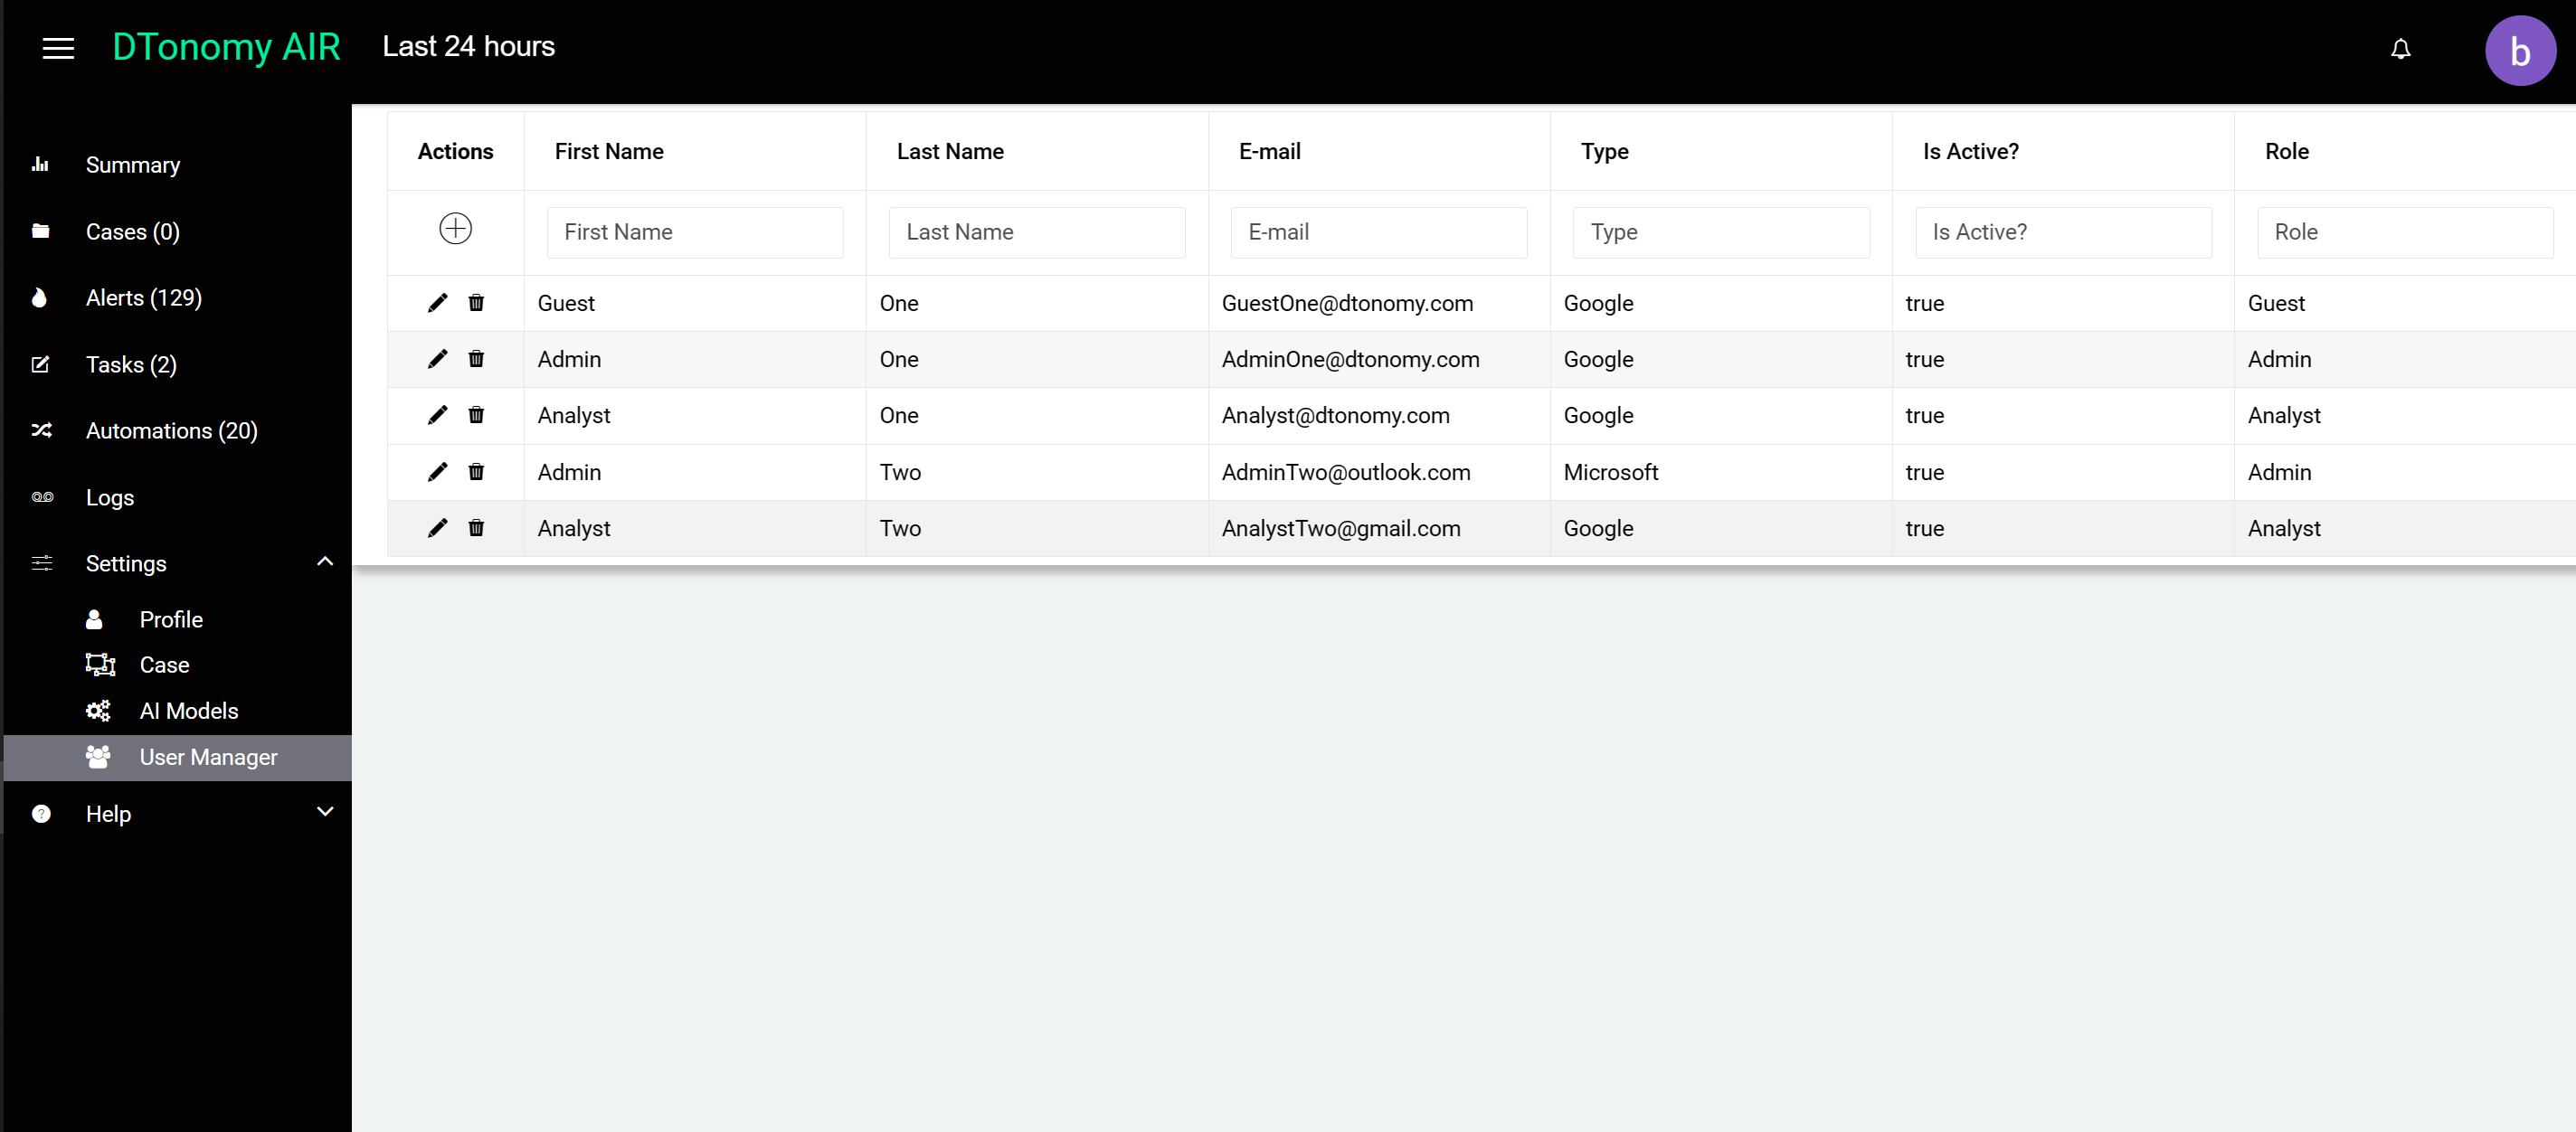
Welcome to the User Management Page. This guide will help you navigate through the process of adding, removing, and assigning roles to users.

Adding a User:
- Click on the ‘+’ button.
- Input the user first name and last name
- Select the type of user account you want to add:
- Google Account
- Microsoft Account
- Enterprise Single Sign-On (SSO) Account
Removing a User:
- Locate the user you want to remove in the user list.
- Click on the ‘Delete’ icon next to the user’s name.
- Confirm your action in the prompt that appears.
Editing a User:
- Locate the user you want to edit in the user list.
- Click on the ‘Edit’ icon (pencil icon) next to the user’s name.
- Confirm your action in the prompt that appears.
Assigning Roles to Users:
- Locate the user for whom you want to assign a role in the user list.
- Click on the ‘Edit’ icon (pencil icon) next to the user’s name.
- Click on the ‘Role’ dropdown.
- Select one of the three roles:
- Admin
- Analyst
- Guest
Understanding User Roles:
- Admin: Full access to all features and functionalities.
- Analyst: Access to all features except the User Manager.
- Guest: Cannot run workflow and access features of “User Manager”, “Case Study”, “AI Analysis”.
Always make sure to save your changes after making any modifications on the User Management Page. If you have any issues or questions, consult the help documentation or contact our support team.